Monday, July 28, 2014

Manicure Monday #2

So I know that not everyone is going to love these nails, but I am totally obsessed with them. I'm serious guys. I repaint my nails like 100 times in a week normally, but I kept these on for like.. 2 weeks. That's a personal record I think.

So here they are!


I completely love them and this whole eye trend thing will definitely be sported on my nails wayyyy more often. 


XX, 
  Harli 


Saturday, July 26, 2014

Boho Babe


Kimonos, floral print, and high-waisted shorts are the epitome of summer in my book. This outfit looks totally summer-ready. Although the outfit looks complicated, all that is really needed for a super cute boho look is 3 pieces; a kimono or cardigan, any printed top, and high-waisted shorts. Don't forget to layer on the bling for added complexity as well!


XX,
   Harli

Sunday, July 20, 2014

DIY Nail Stickers + 24th of July patriotic Nails

If you struggle painting your right hand (or left if you're left handed) like I do, then this tutorial will show you how to achieve equally amazing nails ON BOTH HANDS! 


YOU WILL NEED: 
  • A page protector
  • Nail polish of your choosing (red, white, blue, & glitter for a July 24th mani)
  • A nail striper
  • Graphing paper (optional)

Start off with a white base on middle and ring fingers and silver on all fingers.

I chose to add some micro sparkles to the white nails


On the page protector simply draw the design you are going for.

I chose to draw stars since the 4th of July is quickly approaching. 

Remember to thickly apply the polish to your design so it is easier to remove. 


Peel off the design once it has dried for about an hour & just place it wherever you want on the nail.
I have found that using my fingers is the easiest way to remove the design from the page protector.

Remember to add a layer of top coat to hold the stickers in place.


As another example for some stickers that can be made I gave my sister a pineapple mani! Here's a couple of photos


XX, 
    Harli


Tuesday, July 8, 2014

Cheap Online Shopping ... 10dollarmall.com


Here is a peek at the free outfit I received from 10dollarmall.com
This is not the first time I have shopped at 10dollarmall, however it is the first time they have provided me with free goodies! I have never had a problem with their clothing & this time is no different. 

I received:
- a loose fit Harvard t shirt
- acid wash/distressed shorts         
- gladiator heeled sandals

All together, with shipping this entire outfit would have cost... $29.99! Seriously guys, that's a bargain.


I am obsessed with these shoes. I have worn them almost every day since I got them. They go with almost everything. So, if you have some change jingling around in your pockets then head over to 10dollarmall.com for some really cute inexpensive clothing items.


XX,
   Harli

Saturday, June 28, 2014

Broad Stripes & Bright Stars


To be honest, there are probably 1,000 different nail designs I have floating around in my head that I want to do to my nails this year for the fourth, but I only have so many fingers to paint on so I just whipped up some of the ones I am debating between sporting this coming fourth. So I hope you like these designs!

"Hurrah for the Flag of the Free" (The Stars and Stripes Forever)


Start off with a blue base


Using a large dotting tool and white polish create two big connected dots 3/4 of the way down the nail


Fill in the rest of the nail 


 With red polish and a striper, create red lines only in the white section of the nail


With a silver polish and striper trace over the top of the white


Seal in the design with a fast drying top coat


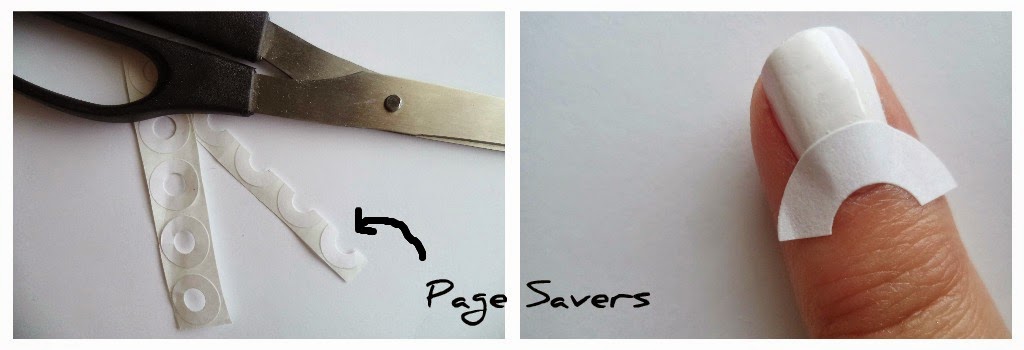
"Home of the Brave" (The Star Spangled Banner)


Start with a white base


Cut some page savers in half and stick to bottom center of nail


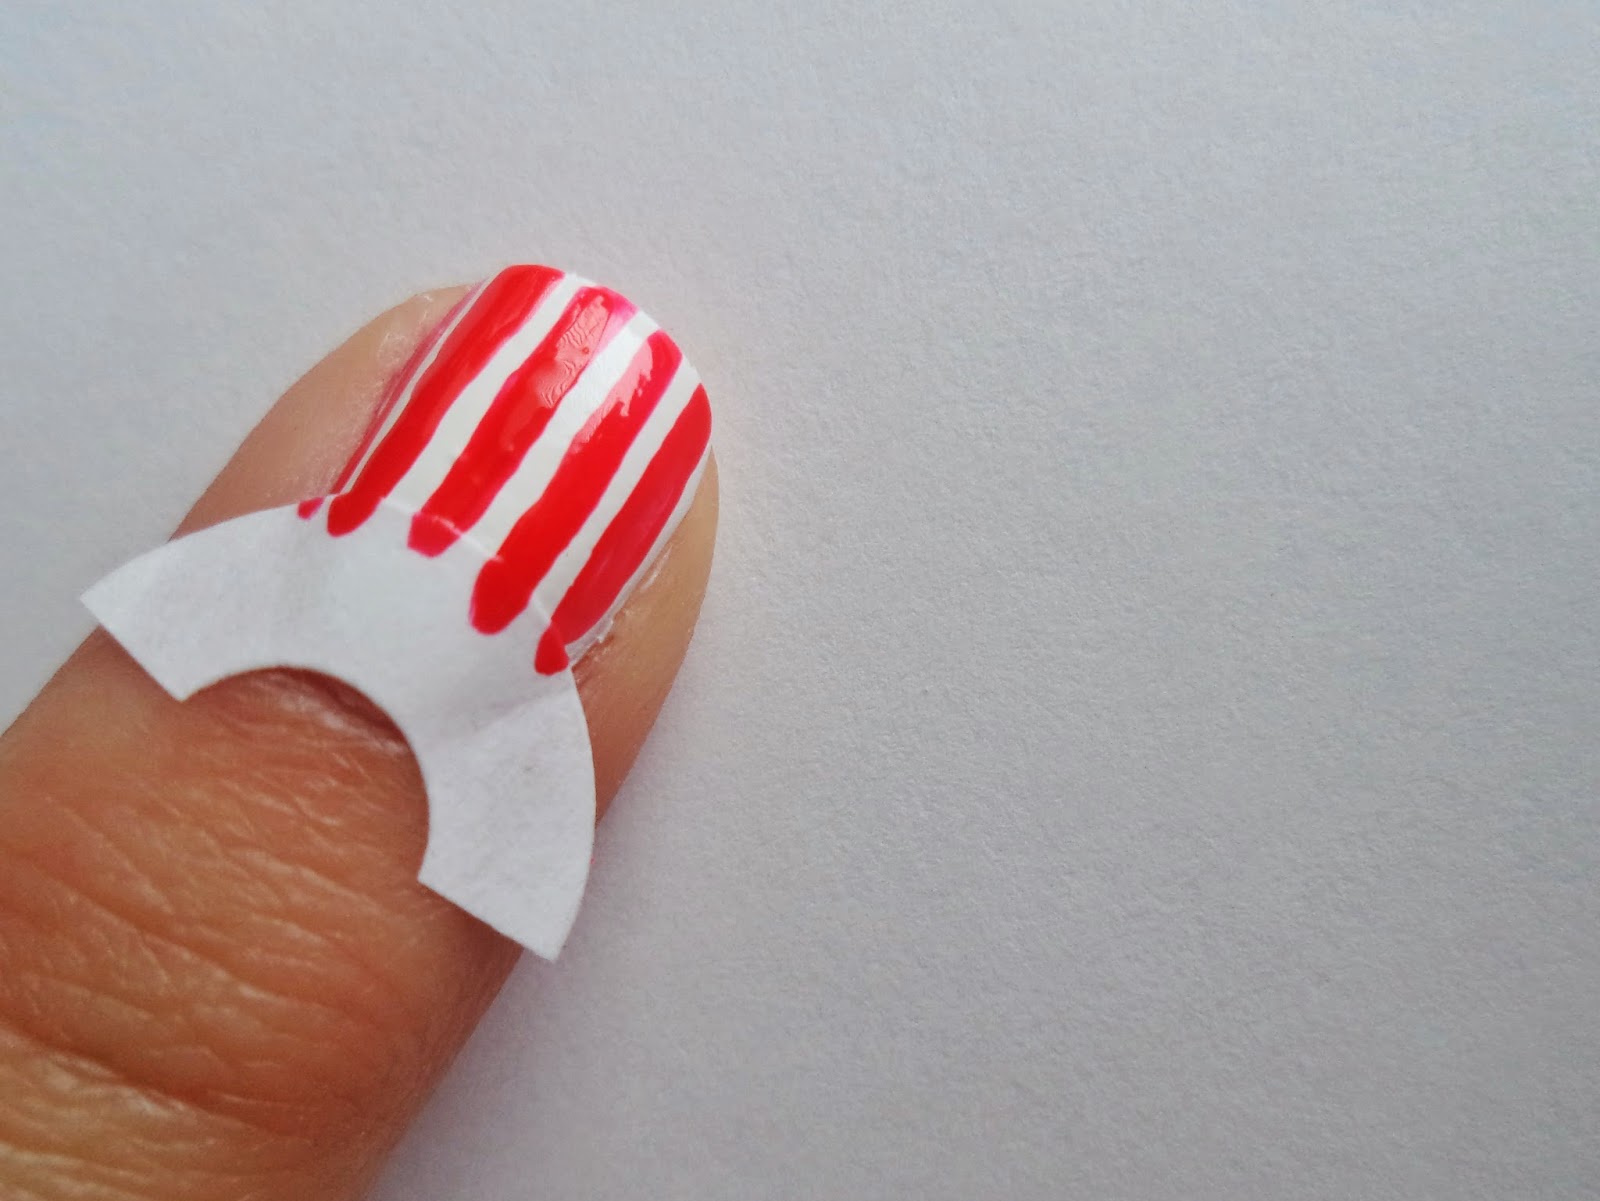
Using red polish and a striper create stripes from the page saver to nail tip


Immediately remove the page saver


Using nail gems or glitter, line between the stripes and half moon


Apply a fast drying top coat


"Uncle Sam Came Here" (Yankee Doodle)


Start off with white nails and paint one with 3/4 red strips and one 3/4 plain blue


Apply a blue dot on the bottom of the stripes and make an "X" across the nail crossing in the center of the blue dot. Fill it in.


Repeat last step on blue nail, but with red polish


Apply white dots or glitters onto the blue part of the nail


Outline the center dot and "X" with white polish. Apply a sideways "V" extending from the center dot

Apply a fast drying top coat. 


"It Waves Forever" (Stars and Stripes Forever)


On a white base, create a blue rectangle in a corner of the nail


Using a striper and red, create horizontal lines across the nail


Add some white dots or sparkles into the blue section of the nail


Apply a fast drying top coat

I hope you enjoyed the first of several July 4th nail art Howtos. Mix and match these designs with other designs of your own creation or with each other for unique, but still patriotic manis!


Harli